Concrete Repair Morgantown WV is essential to maintain structural integrity and extend concrete structures’ lifespan. It requires a thorough inspection, evaluation of the cause of deterioration, and selection of suitable repair methods and materials.
Stitching concrete cracks is a quick and efficient method to repair damaged concrete. However, it is essential to properly prepare and apply the hydraulic cement mixture to ensure longevity.
Even the most expert concrete precasters, who carefully follow all of the proper mix design and production steps, cannot produce a perfect concrete product every time. Therefore, repair will always be necessary at some point. It is best to address problems as soon as they arise, ideally before they become serious and costly.
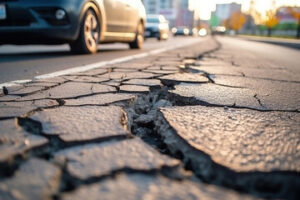
The most important first step in the process of concrete repair is to properly identify the problem. Concrete cracks can be caused by a variety of issues, ranging from structural problems to simple movement in the ground. It is important to understand what type of crack you have, and then apply the correct repairs to fix it.
Some cracks are easy to diagnose, others require more careful evaluation. A professional should be able to walk you through the process of identifying the cause and severity of any cracks in your concrete, and recommend an appropriate solution for each situation.
Once the concrete has been inspected, you must prepare the area for the repairs. This includes removing any unsound concrete, scrubbing the surface to remove difficult dirt and debris, and ensuring that any cracks are properly sealed. This is often done with a light hammer and chisel, but you should be sure to use a lightweight tool so as not to damage the sound concrete.
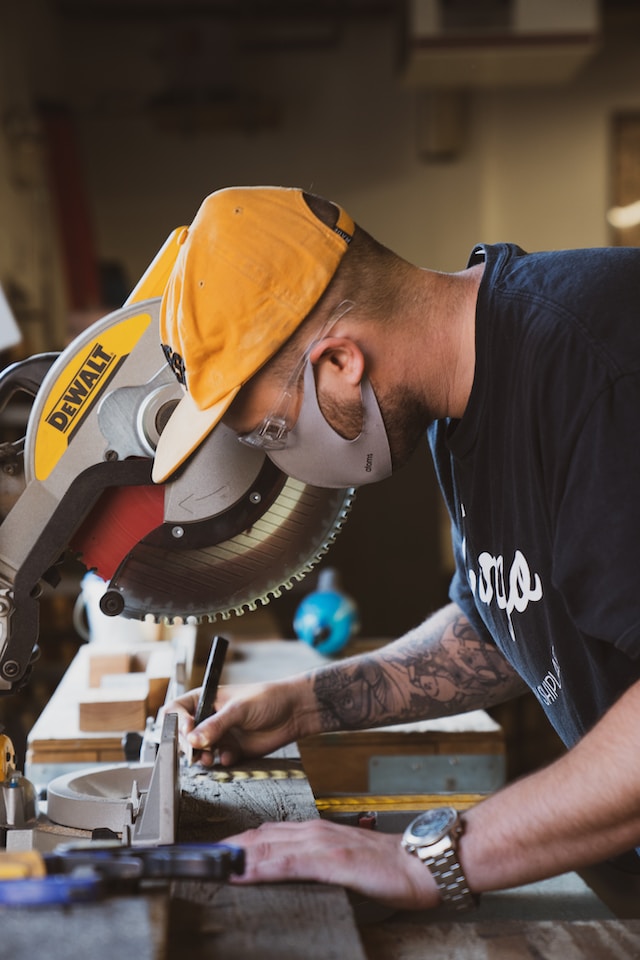
If you have a small honeycomb area that needs to be repaired, consider using a saw to cut the existing concrete and clear it of any loose aggregate. This will make the job much easier and ensure that the new repair materials are bonded well to the existing concrete.
Many repair products claim to be strong at a very early age, but this strength comes with a cost: it is likely that the material will experience drying shrinkage and debond, which will reduce its service life. In addition, the high water vapor pressures inside of concrete can create very high stresses, which are easily strong enough to debond any repair material.
It is a good idea to choose a repair material that has low shrinkage and high permeability, which will be less likely to debond or fail. In addition, the repair material should be frost-resistant and have a low water vapor transmission rate.
Preparation
For concrete repairs to be successful, the existing concrete must accept a good bond with the repair material. This is important for reducing moisture trapping and re-cracking that can lead to long term problems. It is also important that the concrete surface be free of any contaminants that would interfere with the ability of the topical concrete product to adhere to the existing concrete. This includes, but is not limited to: oil or grease stains, mildew, and loose dirt. This contamination can be removed by a thorough cleaning using a power washer and/or brushing.
For structural repairs or when a thicker repair is needed it may be necessary to remove deteriorated concrete to a solid base. This can be accomplished with a hammer drill with a chisel or by chipping away the damaged area. Concrete surface profiling (CSP) should be done to ensure the concrete surface is ready to receive an overlay or coating. The CSP is an approximate measure of the average distance from the peaks to the valleys on the surface and it affects how well the topical concrete products will bond with the concrete. The International Concrete Repair Institute (ICRI) has set CSP standards and provides profile replica blocks to give contractors a point of reference when performing this task.
Once the crack is filled with the concrete repair product it must be protected from extreme weather conditions while it cures. The concrete must not be exposed to direct sunlight or extremely cold temperatures that could cause the crack to shrink and pull away from the surrounding concrete. This can create a new crack that will allow water in and create a freeze-thaw problem.
For small cracks it is usually best to use a dry concrete patching material such as epoxy or latex that can be forced into the crack with a putty knife or mason’s trowel. These materials are not a permanent solution and will need to be reapplied and are not as durable as the full strength concrete repair products. For larger cracks that require a concrete repair mix that has a higher strength it is necessary to use a full strength concrete repair product such as Mapei’s Mapecem 100 which incorporates their High-Hydrated Concrete Technology and can be used for a wide range of applications including resloping floors, leveling low areas of floors, filling trenches, voids or honeycombs, and treating concrete defects.
Application
Concrete repair is a complex process. The success of a repair depends on the design, materials used and application. Many factors must be taken into consideration, such as the type and severity of damage, ability to accomplish the repair correctly, cost comparisons of repair versus replacement and life-cycle costs. These issues are discussed in new resources, such as ICRI’s Repair Guide for Existing Concrete Structures, that elevate concrete repairs to the same level as the design and construction of new concrete structures.
Among the most important factors in the effectiveness of concrete repair is how well the repaired structure bonds to the existing concrete. The bond strength between the new concrete and the existing substrate is a function of the material properties of the repair mix, including its cracking resistance (drying shrinkage and modulus of elasticity), permeability and freeze-thaw durability, as well as the condition of the existing substrate surface.
The mix design of the repair must also consider the type and amount of water to be added. Typically, the mix for repair concrete should be a bit stiffer than that of fresh concrete to reduce cracking and promote proper compaction. However, too little water can reduce the workability of the repair. It is not uncommon to use a concrete repair mix that contains significantly less water than that of fresh concrete, which is referred to as dry pack concrete.
Another factor to consider is the temperature of the environment where the repairs are being performed. If the repairs are being done in a cold climate, or in an area that experiences freezing and thawing conditions, the repair materials should have a lower coefficient of thermal expansion than that of the existing concrete to reduce stresses on the repair that could result in cracking and spalling.
Once the mix has been designed, the application method must be chosen. Typically, the size of the repair dictates this decision. Smaller repairs can be hand-applied, while larger repairs require the mixing of greater quantities and are usually applied using a formed or pneumatic method.
For example, when repairing corrosion-damaged concrete members, FRP wraps may be used to provide a barrier to oxygen and moisture, which can slow the rate of deterioration. However, other studies have found that these wraps can actually increase the corrosion activity by allowing moisture to enter the steel fibers and reactivate them. This can cause the formation of rust and, in turn, lead to additional corrosion and eventual structural failure.
Finishing
Concrete repair is a challenging project, especially for contractors who must work in the field. Many different factors affect the concrete repair process, including material selection, application methods, and finishing techniques. Whether the repairs are for new construction, rehabilitation, or maintenance of existing structures, quality control procedures are key to a successful outcome. These procedures include obtaining and reviewing before-and-after photographs of the repairs, checking surface preparation, ensuring the appropriate materials are used for the intended use, and sounding the finished repair to detect voids or lack of bonding.
The final step in the concrete repair process is to finish the repaired area to match the surrounding surface. This is done by spraying the surface with water to hydrate the cement particles. This helps ensure a strong, durable repair. The mating surface must be in saturated surface dry (SSD) condition for workability, but should not be so wet that it pulls moisture away from the concrete repair. If the old concrete is very porous, it may require several applications of water to fully saturate the surface.
Depending on the type of concrete repair, surface texturing may also be required. This step exposes the aggregate in the concrete and adds a decorative touch to the finished repair. It’s important to follow proper curing techniques as well, to prevent moisture loss and drying shrinkage cracking.
While there are many different types of concrete, they all have one thing in common – they must be strong enough to withstand the stresses that are placed on them in everyday use. This is why a thorough quality control program is necessary to ensure the structural integrity of the concrete is upheld during construction and maintenance. A good quality control program will include documenting the repairs with before-and-after photos, confirming the surface is prepared correctly, observing the cleanliness of the surface, sounding the finished repairs to detect voids or lack of bonding, and using direct tensile testing to determine the strength of the cured concrete. This will help the contractor provide a quality repair that can withstand the loads placed on it.
